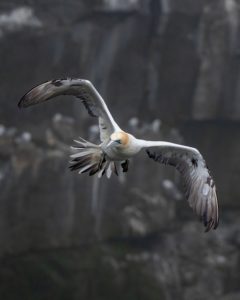
Photographing hummingbirds in flight is one of the most rewarding but challenging aspects of bird photography. These tiny creatures beat their wings up to 80 times per second, creating a blur of movement that’s difficult to freeze in a photograph. But with the right techniques, you can capture stunning images that showcase their agility and beauty. Here are five essential tips for photographing hummingbirds in flight.
1. Use a Fast Shutter Speed
Hummingbirds move incredibly fast, so you’ll need a shutter speed of at least 1/4000 of a second to freeze their wings in motion. If you want to capture the blur of the wings while keeping the body sharp, aim for something a little slower, like 1/1000. Play around with different speeds to see what effect works best for your style.
2. Shoot in Burst Mode
Because these birds move so quickly, shooting in burst mode allows you to capture multiple frames per second, increasing your chances of getting that perfect shot. Most DSLRs and mirrorless cameras come equipped with this feature, which is essential when photographing fast-moving birds.
3. Focus on the Eyes
As with most wildlife photography, getting the eyes in sharp focus is key to a successful shot. Set your autofocus to continuous tracking (AF-C) so it follows the bird’s movement, and try to lock onto the head or eyes. This ensures that even if the wings are blurred, the focal point of the image is sharp.
4. Use Natural Light to Your Advantage
Early mornings or late afternoons provide the best lighting conditions for bird photography. The soft light during golden hours helps prevent harsh shadows and enhances the vibrant colours of the hummingbird’s feathers. Avoid shooting in the middle of the day, when the light can be too harsh and create blown-out highlights.
5. Position Yourself Near Feeders or Flowers
Hummingbirds are attracted to bright flowers and feeders filled with sugar water. Setting up your camera near these feeding spots increases your chances of capturing them mid-flight. Try placing feeders in front of a neutral background, such as green foliage, to make the hummingbird stand out in your photos.
These tips will help you get started with hummingbird photography, but there’s much more to learn when it comes to refining your technique. Our Hummingbird Photography Workshops in British Columbia take you deeper into the art of capturing these stunning birds in motion. We provide hands-on instruction in beautiful locations filled with hummingbird activity, offering the perfect setting to practice and perfect your skills.
Ready to take your hummingbird photography to the next level? Join our workshop and learn from the experts!